Navigate to (homing line)
'Navigate to' gives you the option to select a target to sail or move to. Once a Target is selected, a straight line will be drawn between a point on your equipment and the Target - the homing line. The homing line will be continuously updated as both your equipment and/or the target may be moving.
Be aware that the software does not take into account any obstruction in the path of this straight line, you are responsible for your own safe navigation.
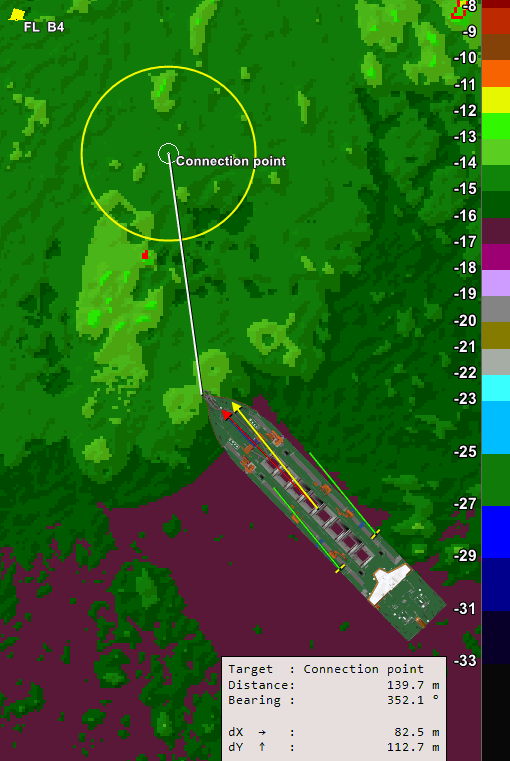
The following Targets can be used for Navigate to:
-
Dump Box
-
Waypoint
-
Structure
-
AIS
 Automatic Identification System - is comprised of small transponders fitted to shipping vessels worldwide, which use short wave VHF radio signals to broadcast each vessel’s position, unique International Maritime Organisation (IMO) identity number and other useful information. The transmissions can be received by any vessel, land station or satellite in range and fitted with an AIS receiver. Target / ETS Equipment Tracking System - can be compared to AIS, to show surrounding vessels or equipment Target
 -
Custom
 Hint: Rather than using 'Navigate to' for you to move to a Target, you could use it to
see the time it will take for a crew tender to arrive at your vessel
(look up the crew tender in the AIS list).
Hint: Rather than using 'Navigate to' for you to move to a Target, you could use it to
see the time it will take for a crew tender to arrive at your vessel
(look up the crew tender in the AIS list).
On this page:
Note: Navigate to... is closely related to option Navigate to here (Bullseye)
Navigate to
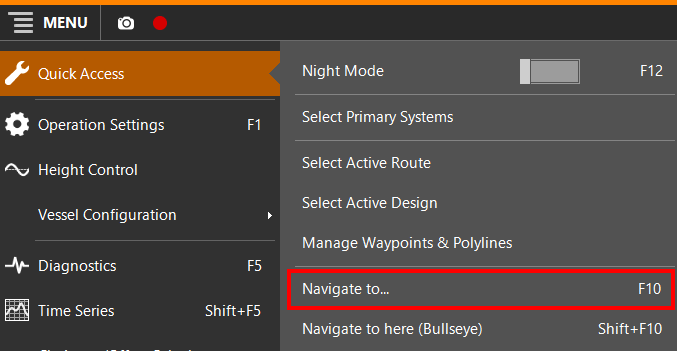
Navigate to... is started here:
 MENU > Quick Access > Navigate
to... or:
MENU > Quick Access > Navigate
to... or:
Keyboard: F10
Select which type of Target you want to Navigate to:
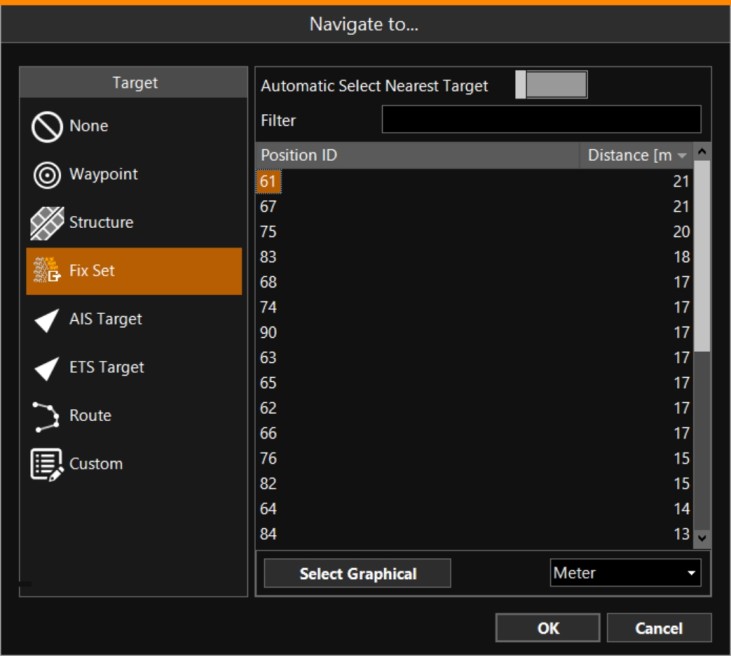
Available Targets are shown in a list. The distances from your equipment to each Target will be shown in the unit you chose: Nautical Mile, Meter or Kilometer.
Various Targets can be chosen from a list or Graphically.
Choose Target from list
-
Click on a Target from the list to select it and then click OK
-
You can make the list smaller by typing something in the 'Filter' box, like 'cardinal' or a ship's name
-
You can sort the list by clicking on the headers of the columns, for example 'Distance'
Choose Target Graphically
Click on the 'Select Graphical' button and then click on the desired Target in the Top View. If a Target was found, it will be highlighted in the list. Click OK to confirm your choice.
To choose, for example, a Waypoint graphically, make sure to first click on the 'Waypoint' Target type on the left side of the 'Navigate to...' window.
To define a 'free hand' Target graphically, choose the Custom type and then click ' Select Graphical'.
Navigate to Route
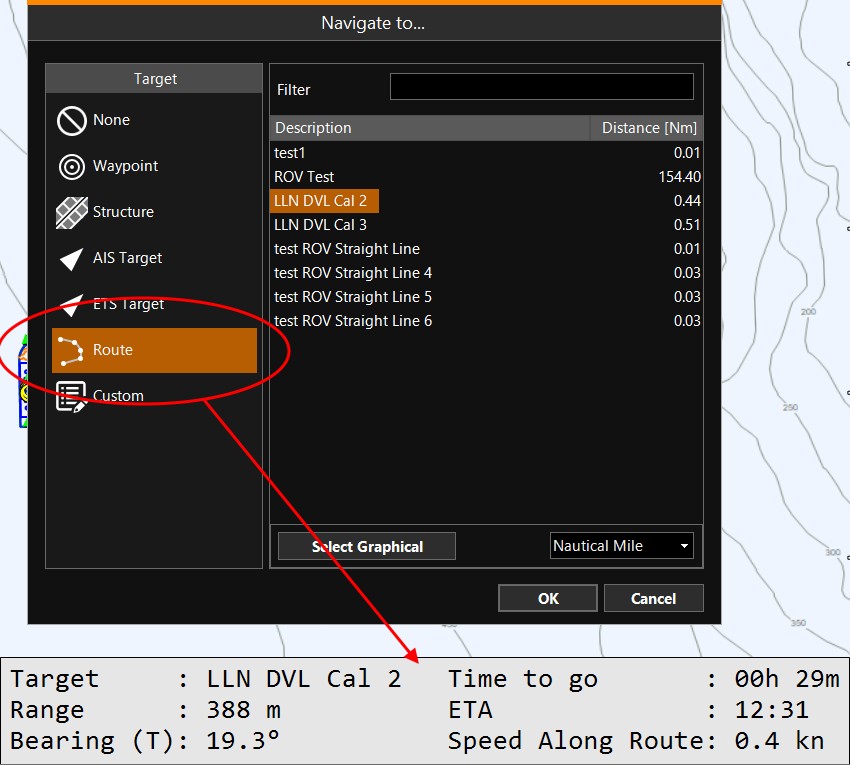
When a route is selected, the distance, Time to go and ETA are all based on the distance along the route (instead of a straight line to the end point).
Also, the Speed Along Route will be shown when a route is selected.
Depending on the Course Over Ground of the vessel in relation to the route heading, the route will be automatically reversed and the info shown is based on navigating to the start or end of the route.
Navigate to Custom target
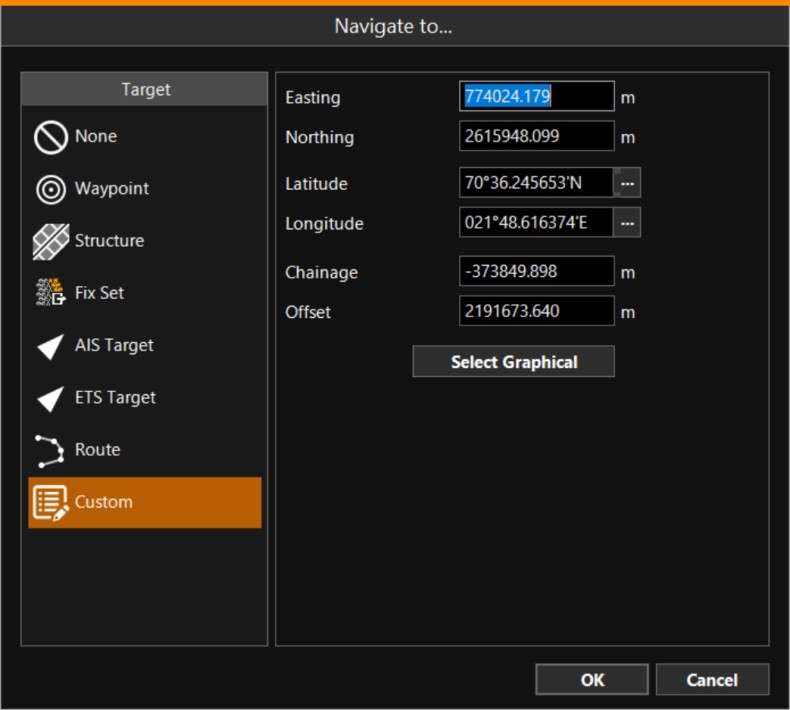
The coordinates of the Target can be entered in various coordinate types:
-
Grid
A type of DTM that is made manageable through sampling measured points into a regularly spaced raster, allowing fast and conditional access. Considered to be a secondary data set; since no original points are kept.. coordinates (Easting and Northing) -
Geographical coordinates (Latitude and Longitude). The format °, ° ' or ° ' " can be changed by clicking the [...] buttons
-
Chainage and Offset
Navigate to - Settings
The way the Homing Line, the Target Circles and the Target Info box are shown, are set in this dialog in the Operation Settings.
See page: Navigate to - Settings