Capture Settings
Making a video or snapshot of your VOSS RT screen is very easy.
On this page:
To the right of the MENU button on the top left side you will find both the video and snapshot buttons:
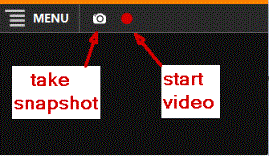
You can use them to record images or videos to report issues to the office.
When you start recording a video, the red dot changes into a square.
Click on the square to stop recording.
Video and snapshot folder and settings
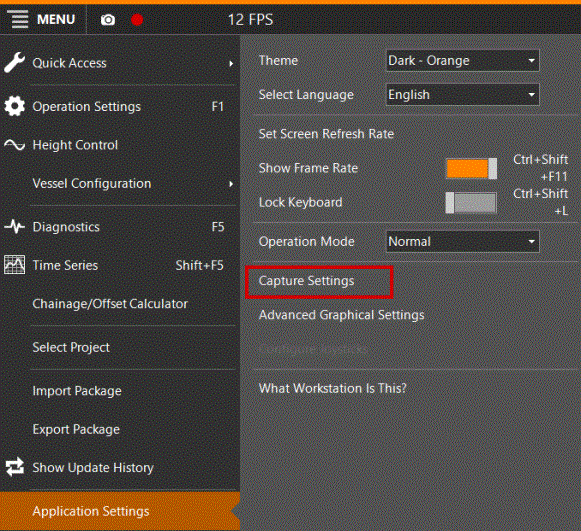
To check or change where videos and snapshots are stored and for other related settings:
 MENU > Application
Settings > Capture Settings
MENU > Application
Settings > Capture Settings
|
Capture Settings |
|
|---|---|
|
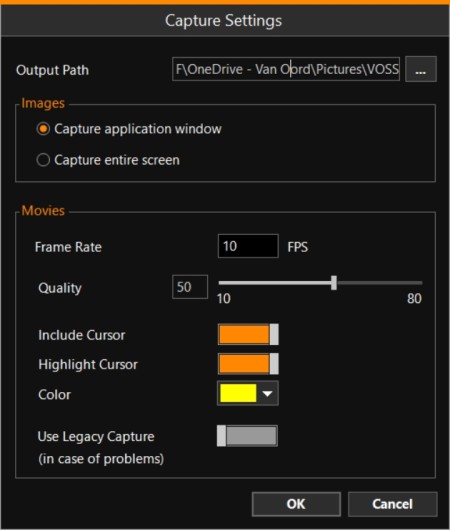
Output Path |
Use the browse button [...] to select a location for storing the captured images. |
|
Images |
|
|
Capture application window |
Only take a snapshot of the window in use. |
|
Capture entire screen |
Take a snapshot of everything visible on your screen, including items which are not part of VOSS RT. |
|
Movies |
|
|
Frame Rate |
Enter how many updates of the screen per second will be recorded. The higher the value, the smoother the recording will be. 10 frames per second is the recommended setting. A higher rate will make a smoother recording, but it will increase memory usage. |
|
Quality |
Use the slider button to improve or to lower the quality of the recording. 50 is the recommended quality. Higher settings increase memory usage |
|
Include Cursor |
The mouse cursor can be included in videos. This way, you can point out items and show which selections you make in the screen. |
|
Highlight Cursor |
The cursor will receive a colored circle around it, so it is easier to spot when moving around the screen and clicking on options. See below at Record Movie.
Select a color from the drop down menu. |
|
Color |
Select a color for the cursor from the drop down menu. |
|
Use Legacy Capture (in case of problems) |
When you experience problems with your recording, you could activate this option. When the recorded video is totally black, this setting can be enabled to prevent that from happening. It is slower and uses more computer resources. It's the old way of taking a video capture vs. the new / standard way. |
Save Snapshot
Click on the camera button to save a snapshot and automatically store it in the location as defined in the Settings.
Record Movie
Click on the button with the red dot to start recording and click on the red square to stop the recording.
The recording will automatically be stored in the location as defined in the Settings.
Note: While recording a movie and moving around the cursor, the highlight around it will not be visible. Only after saving will it appear.